Key Takeaways
- Drain and flush all water tanks and pipes; use RV-grade antifreeze to protect plumbing.
- Seal windows and doors with weatherstripping for draft prevention.
- Inspect and reinforce exterior seals to prevent leaks and drafts.
- Install thermal blankets and insulation kits for improved interior warmth.
- Store disconnected hoses in a dry place to avoid freezing damage.
Introduction
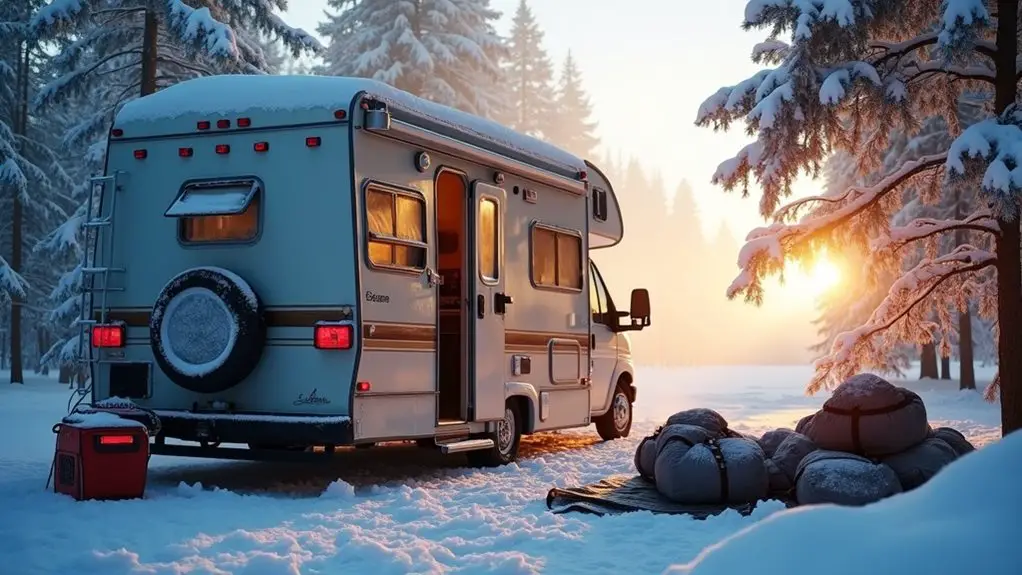
So, you’re thinking of taking your trusty RV out in the cold—or perhaps parking it for winter—and you’re worried it might turn into an ice sculpture, huh?
Proper winterization isn’t just a good idea, it’s a must if you’d rather not face a flood of tears (and expenses) come spring.
From protecting your water system from becoming an icy mess to keeping your power and insulation in check, this guide’s got your back like your favorite snug blanket.
Overview of cold-weather risks
When winter’s chill sets in, your RV faces enough cold-weather hazards to make even Frosty the Snowman shiver. Your water system’s plumbing is at high risk of freeze damage—trust me, burst pipes are the worst souvenir from winter! Antifreeze, specifically non-toxic RV antifreeze, is your best friend here. It keeps those pipes safe, saving you from expensive repair bills.
But that’s just the beginning: freezing temperatures aren’t just a menace to your plumbing. Exterior seals can crack, causing leaks and water damage.
Rust doesn’t take a vacation either, creeping in to corrode metal parts like a slow-motion horror movie.
Oh, and mold? It loves damp, neglected nooks, leading to health hazards and headaches.
Prepare now for a drama-free winter! By monitoring the dewpoint, you can prevent hidden condensation issues and plan effective ventilation dewpoint.
Importance of proper seasonal protection
Let’s talk about why rv winterization is your trusty sidekick come wintertime!
Imagine water expanding like an overeager squirrel stuffing its cheeks—except it’s in your pipes, causing all sorts of chaos. Without proper insulation or a water heater bypass, you might be looking at some icy surprises and hefty spring repairs.
What’s worse than forgetting an umbrella in the rain? Not winterizing your RV before the first frost hits. We’re talking potential frozen pipes that could ruin your winter camping dreams faster than you can say “bobsled.”
Think of proper seasonal protection like a warm, snug sweater for your RV. It’ll keep everything cozy and functional, allowing year-round adventures, minus the cold-induced hiccups!
Quick mention of key systems (water, power, insulation)
Before you hit the pause button on those epic RV adventures, let’s chat about the lifelines of your camper: water, power, and insulation.
Picture your RV basking in a cozy cocoon while winter storms rage outside. Start by ensuring your plumbing’s ready: drain and flush those water tanks—no one needs icy surprises!
When it comes to power, pamper your battery. A little TLC goes a long way, so disconnect and store it indoors to keep it healthy.
Now, on to insulation. Think of it as wrapping your RV in a snug blanket. Skirting and vent covers work wonders, sealing out the cold like a pro bouncer.
Winter may be coming, but you’re ready!
Preparing for Winterization
Alright, so you’re planning to tuck your RV away for the winter—smart move!
Let’s make sure it’s ready to hibernate. Start by giving the interior a good clean, especially those food crumbs that might lure rodents looking for a winter party.
Check all seals around windows, doors, and vents to shield your RV from chilly drafts and potential leaks. Don’t forget about your propane/gas system; a quick inspection can save headaches later.
Gather essential tools like an air compressor and RV/Marine-grade antifreeze to de-winterize efficiently come spring.
Open faucets and low-point drains to send that pesky residual water packing before it freezes into a mini glacier.
Winter might be cold, but your vibes should stay chill.
Assessing Your Region’s Winter Severity
So, you’re thinking about winterizing your RV, but first, let’s chat about your regional “winter wonderland” factors.
You might want to check if you’re in the magical freeze zone where temps love to hang out below 30°F, enthusiastic to turn your dreamy road trip plans into an icicle parade.
Also, keep an eye on snow load and wind exposure – after all, nobody wants their RV to double as a wind-surfer or snowman this winter!
Freeze zone mapping
Brace yourself, folks! Freeze zone mapping is your trusty guide through the frosty wilderness of RV winterization. Think of it as your roadmap, highlighting those chilly regions where temperatures delight in dancing below 30°F for ages. Sounds fun, right?
Diving into this map isn’t just a fact-checking exercise; it’s essential for crafting your winterization strategies. Comprehending your zone guarantees you can keep your propane/gas system from freezing up like a vintage ice cube tray.
The USDA Plant Hardiness Zone Map is a handy tool, telling you exactly how nippy your area gets. Combine this with local forecasts, and you’re an Arctic explorer, my friend!
Getting ahead of those sneaky frost dates means fewer surprises and more hot cocoa by the RV fire.
Typical temperature drops
Envision this: you’re cozied up with a cup of cocoa, dreaming of marshmallow roasts by the RV fire pit, but outside, the weather’s turning your camper into a popsicle.
Those dreaded winter temperatures mean it’s time to think about de-winterization! Yeah, holding tanks shivering in their boots isn’t ideal.
In colder regions where temperatures can dip below 30°F for long periods, RV water lines are at high risk of becoming icy disasters.
Picture inland areas getting hit with surprise cold snaps, almost like they forgot to RSVP to winter. Monitoring local forecasts is essential since sudden drops can sneakily freeze your pipes.
On the bright side, coastal places might only offer flurries of mild weather compared to their chilly inland buddies.
Snow load and wind exposure
When winter rolls around, it’s not just your fuzzy socks that need upgrading; your RV does too!
Imagine this: a snowstorm that turns your camper van into a giant snow cone. Evaluating snow load is vital because, believe it or not, your RV’s roof isn’t meant to carry a mini-mountain of snow.
And don’t even get me started on wind exposure! Strong winds can whip snow into drifts, creating uneven stress on your van’s structure. Regions in USDA Zones 3 and 4 face harsher winters, so brace yourself!
Monitoring weather forecasts is essential—think of it as your RV’s daily horoscope. With heavy snow or icy blasts, your holding tanks (fresh, grey, black) need extra attention to avoid a frosty fiasco!
Supplies and Tools Checklist
So, you’re gearing up to winterize your RV, huh? Well, before you start, make sure you’ve got all the essentials: antifreeze made from propylene glycol, an air compressor paired with a blow-out plug, and of course, some trusty wrenches and a funnel—because who doesn’t love a good funnel?
Don’t forget gloves, thermal blankets, and insulation kits; after all, keeping your RV cozy and frostbite-free is the name of the game, unless you’re trying to turn it into an oversized popsicle!
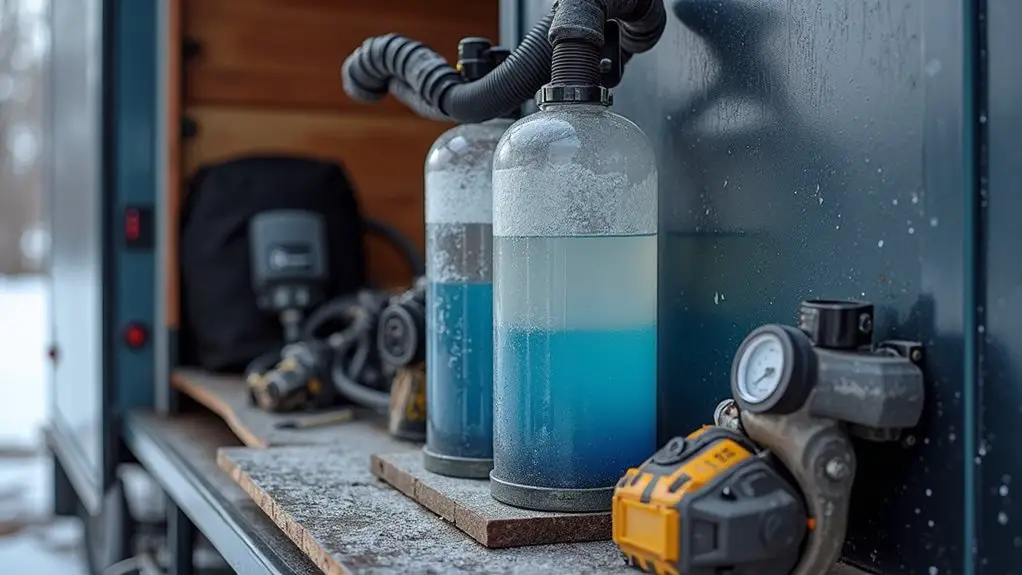
Antifreeze (propylene glycol)
Alright, folks, let’s talk about RV antifreeze—a propylene glycol wonder that keeps your trusty camper van’s plumbing from becoming an ice sculpture.
You see, when Jack Frost starts nipping, you’ll want this pink potion flowing through your pipes. It’s specially formulated for RVs, so no need to worry about poisoning the planet—or yourself. It’s like magic!
On average, you’ll need 2-3 gallons, depending on your van’s plumbing. It’s notable for its vibrant pink hue, which acts like a friendly reminder that, yes, you did indeed winterize.
Trust me, you don’t want a surprise when the thaw hits! Check your manual to confirm the antifreeze type and quantity. Following these tips guarantees your van’s pipes won’t turn into a wintery disaster.
Air compressor with blow-out plug
Grab your air compressor and let’s plunge into the world of RV winterizing. Ready to go all MacGyver with your camper van? The air compressor’s your trusty sidekick, essential for blowing out those water lines.
Imagine this: you’re like a storm busting through the pipes, banishing all those stubborn water droplets before they freeze into trouble-making ice. This wouldn’t be possible without a blow-out plug adaptor. It’s the unsung hero that hooks your air compressor to the city water connection, ensuring every last bit of water is kicked to the curb.
Pair this dynamic duo with RV/Marine-grade antifreeze—not the pesky automotive kind—and you’re setting your RV up for winter victory. Time to keep Jack Frost at bay!
Wrenches, funnel, gloves
Now that you’ve got your air compressor humming along, it’s time to expand our tool repertoire.
Meet your new best friends: wrenches, a funnel, and gloves. Think of the socket wrench as your trusty sidekick for draining the water heater—it’s like the Batman of wrenches. You’ll feel all in control as you handle those stubborn bolts.
The funnel? It’s not just for science experiments; it’s your go-to for pouring RV/marine-grade antifreeze like a pro.
And gloves? Well, they’ll keep those precious fingers safe from grime and gunk—nobody likes a surprise antifreeze manicure.
Thermal blankets, insulation kits
When it comes to keeping your RV snug as a bug in a rug throughout winter, thermal blankets and insulation kits are like cozy pajamas for your camper van.
Imagine lounging in your favorite flannel PJs while snowflakes gently fall outside. That’s the vibe these insulation essentials bring to your van.
Thermal blankets are champs at reflecting up to 90% of radiant heat, drastically reducing your van’s heat loss. Pair them with foam or reflective insulation kits tailored to your ride, and you’ll have a travel-ready igloo that’s surprisingly toasty.
Don’t overlook magnetic window covers for extra warmth—they’re easy to pop on and off! Plus, weatherstripping around doors and windows keeps pesky drafts at bay.
Prepare to hibernate!
Step-by-Step Water System Protection
Alright, folks, it’s time to buckle up and protect your RV’s water system from turning into Elsa’s ice palace this winter.
First, empty all your water tanks. Think of it as making sure there’s no sneaky ice hidden anywhere.
Turn on every faucet in your RV—yes, even the one hiding in the bathroom. This guarantees no drop of water remains to freeze up on you.
Now, here’s the fun part: invite an air compressor to the party! Connect it to the city water hookup and let it huff and puff until water runs dry.
Don’t forget to bypass the water heater—trust me, antifreeze in there’s a big no-no.
Finally, flood those pipes with RV antifreeze until everything runs pink!
Voilà, you’re ready to brave the winter!
Draining Fresh, Grey, and Black Water Tanks
Alright, time to get your hands dirty with the not-so-glamorous task of draining those water tanks!
First, you’ll want to give the black tank the boot—nobody wants yesterday’s dinner hanging around too long—so open that valve and let gravity do its magic.
Then move on to the gray tank; it’s like giving your plumbing a nice pressure flush with what’s left of dishwater and soap, finishing off with the fresh water tank to keep everything squeaky clean and freeze-free.
Open all drain valves
Imagine you’re an RV superhero, tasked with saving your camper from a winter disaster. Your mission? Open all drain valves like a pro.
First, grab those hoses and fittings. They’re your trusty sidekicks in this adventure. Start with the black tank drain valve. It’s like taking out the trash before a vacation.
Next, tackle the gray tank to give it a good rinse—no dirty leftovers allowed!
Now, onto the fresh water tank. Turn off the water pressure and open that drain valve wide. Like finishing a giant slushie, you want it empty.
Wrap up by opening all faucets, inside and out. You’re helping every last drop exit the stage.
Use gravity and pressure flush
So, you’ve tackled the RV’s draining adventure like a pro by opening all the drain valves.
Now it’s time to show gravity who’s boss. Start by draining the black water tank—yep, it’s the gross one with all the “essentials.”
Next, tackle the grey tank, holding water from sinks and showers. Think of it as spa day for your RV’s plumbing.
Use gravity to work its magic. Tilt the RV slightly if needed, to guarantee every last drop finds its way outta there.
Once the tanks are crying empty, flush that black tank using a dedicated cleaner. This guarantees nothing lingers to haunt your spring.
Don’t forget to drain the fresh water tank and tightly seal all valves afterward.
Voilà, you’ve mastered the flush!
Bypassing and Draining the Water Heater
Alright, let’s tackle bypassing and draining your RV’s water heater without making you cry over spilled antifreeze.
First, grab your water heater bypass kit—it’s like a little shield that keeps the precious pink stuff from going where it doesn’t belong.
Water heater bypass kit installation
Installing a water heater bypass kit in your RV is like giving yourself a shortcut on a road trip—less hassle, fewer resources wasted.
Imagine skipping that unnecessary gas station stop; that’s what a bypass kit does by diverting water away from the heater. Grab your trusty screwdriver and wrenches, and find the clever inlet and outlet lines on the water heater.
It’s a bit like solving a puzzle, except you can’t peek at the box for answers. Follow the manufacturer’s guide for your RV model because it’s not one-size-fits-all, like trying on hats at a thrift store.
With the valves set to winterize, your antifreeze won’t take an unnecessary detour into the heater. Remember, in spring, undo your bypass magic!
Avoiding antifreeze waste
You’ve tackled the challenge of installing a water heater bypass kit, and now it’s time to ask, “Why waste good antifreeze when you don’t have to?”
Imagine squeezing every last drop of ketchup from a bottle—no one wants to waste it, right? So, what’s the secret sauce here?
First off, make sure those bypass valves on your water heater are correctly adjusted. You’re sidestepping the headache of pouring antifreeze where it’s not needed.
Draining the water heater is key—turn it off, cool it down, and give it a good drain with a socket wrench. Not only do you save on antifreeze, but you’re also shielding your water heater from frostbite.
And hey, double-check those faucets are closed before the antifreeze parade kicks off.
Using Air Compressor or Antifreeze Method
When it comes to winterizing your camper, choosing between the air compressor blow-out method and the antifreeze approach can feel like deciding between coffee and tea—each has its fan club!
The blow-out method has you connecting an air compressor to the city water inlet and blowing out every faucet, valve, and toilet until they’re drier than a desert.
On the other hand, the antifreeze method involves pumping RV antifreeze through the lines, coloring everything pink, and protecting your plumbing from Old Man Winter’s icy grip.
Blow-out method via city water inlet
Getting ready to face Old Man Winter head-on with your RV? Well, grab your air compressor and give that plumbing system a good old blowout!
The blow-out method is like playing tag with the water—you’re it, and the water’s gotta run! First, connect your trusty air compressor to the city water inlet with a blowout plug adaptor. This stops nasty leaks and sends those water droplets packin’.
Open all faucets and low-point drains, then blast each line individually until they’re as dry as a desert. No droplet left behind!
Just remember, once you’re done playing tag, follow up with a splash of RV/Marine-grade antifreeze. It’s your insurance policy against Old Man Winter’s icy grasp!
Happy winterizing, champ!
Pumping antifreeze through lines
So, you’ve tackled the blow-out method and sent all that sneaky water scurrying out of your RV’s lines.
Now, it’s time for the antifreeze method, the trusty backup in your winterizing toolkit. First, activate the water heater bypass valve—no need to flood it with expensive antifreeze.
Next, grab that RV/Marine-grade antifreeze, attach it to the water pump using a pick-up tube, and prepare for an antifreeze adventure. Open each faucet like you’re about to stage a pink fountain show and flush those toilets until you see pink.
It’s like magic, but really just smart winter preparation. Finally, verify all your faucets are closed tight, and the water heater is off. You’re all set for winter!
Protecting all faucets, valves, and toilets
Alright, time to roll up those sleeves and plunge into protecting your RV’s faucets, valves, and toilets from Jack Frost’s icy grin.
First, start by draining every last drop from the water system—time to show no mercy! Open all faucets and flush toilets like it’s a fire drill.
For the fearless air compressor route, attach it to your RV’s city water connection and blast out those lines. You’ll know you’ve won when no water trickles out.
If pink is more your color, grab some RV/Marine-grade antifreeze. Let it flow through faucets, showers, and toilets until they blush pink.
And don’t forget: pour some down the drains and the toilet bowl to keep those P-traps cozy.
Make sure the water heater bypass valve is set correctly—it’s checkmate against winter!
Winterizing External Water Connections
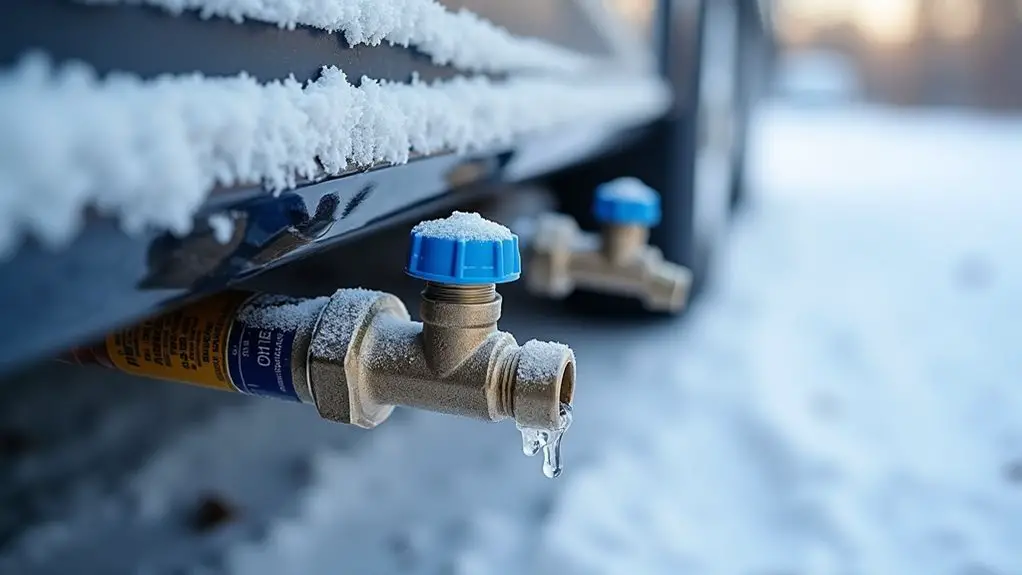
Let’s talk about the joy of winter and the not-so-fun task of disconnecting those external water connections on your RV.
First off, make sure you unplug and store those hoses before they freeze up like forgotten popsicles.
If you’re one of those brave souls who camp in winter, consider using heated hoses; they’ll be your best buddies when the temperature drops faster than your phone battery in the cold!
Disconnect and store hoses
Hey, it’s RV winterizing time, and that means it’s time to disconnect those pesky hoses!
First off, let’s avoid turning your hoses into giant ice pops. Disconnect all those external water hoses from your RV. Thoroughly drain and clean them to keep mold and mildew at bay.
Fun fact: Hoses don’t throw winter parties, so store them in a nice, dry spot where they won’t freeze and crack—we don’t want any hose drama in spring!
And hey, don’t forget those sneaky quick-connect fittings. Get them unhooked and stored too.
Before you toss hoses back into action next spring, give them a good inspection for any wear and tear. You don’t want surprises when you’re ready to hit the road again!
Use heated hoses if winter camping
After wrangling those hoses out of the icy clutches of winter and putting them away, you’ll want to keep the water flowing when the mercury tumbles if you’re braving the cold in your RV.
Enter the unsung hero: heated hoses! These nifty gadgets have built-in heating elements ensuring your water supply doesn’t turn into a popsicle.
Make sure you’re choosing hoses rated for drinking water—because, you know, you’d rather not have a side of chemicals with your H2O. Some even sport thermostatic controls, automatically springing into action when temps drop.
Think of them as your personal water guardians. For extra coziness, wrap the connections in insulation or heat tape. It’s like giving your water supply a toasty blanket hug.
Plumbing and Interior Fixtures
Winterizing your RV’s plumbing system might sound as fun as watching paint dry, but trust me, it’s an essential step to keep your RV in tip-top shape during the chilly months.
Start by fully draining all the water tanks—you know, fresh, gray, and black. Make sure every drain valve is wide open to kick any pesky leftover water out.
Draining your RV’s fresh, gray, and black water tanks is crucial to avoiding freezing issues.
Next up, give your water heater a good flush per the manufacturer’s biblically precise instructions and bypass it to keep the antifreeze from crashing the party there.
Pour RV-specific antifreeze like it’s going out of style down all sinks and into showers. Open every faucet and low-point drain until you see that sweet pink hue of antifreeze.
Don’t forget to check those fixtures for leaks!
Protecting Sinks, Showers, and Toilets
Alright, it’s time to guarantee your RV’s plumbing isn’t an icy disaster waiting to happen—let’s talk about sinks, showers, and toilets!
For starters, you’ll want to pour some of that trusty RV antifreeze down each drain trap and bowl; think of it as a winter coat for your pipes.
And don’t forget to flush enough antifreeze into the black tank—it’s like sending them off with a cozy blanket for those chilly months.
Pouring antifreeze into traps and bowls
No one wants to deal with cracked pipes and soggy disasters while dreaming of a cozy winter.
So, let’s keep your RV disaster-free by pouring RV/Marine-grade antifreeze into every sink and shower drain. Think of it as giving your RV’s pipes a warm scarf for the winter!
Make sure you use at least one cup per trap—you’re not making a cocktail here, folks.
Don’t forget the toilet! Flush until you’re seeing not pink elephants, but pink antifreeze. Leave enough in the toilet bowl to fill the trap without flushing it away.
Pre-mixed RV antifreeze is your best buddy; don’t let automotive antifreeze crash this party—it’s not designed for RV systems and could cause some unwelcome plumbing drama.
Flushing antifreeze into the black tank
Even though antifreeze may not be your go-to smoothie ingredient, it’s a wintertime superhero for protecting your RV’s plumbing system from Jack Frost’s icy grip.
Start by ensuring your black tank is empty; no one needs a surprise blend of antifreeze and leftovers! Slowly pour RV/Marine-grade antifreeze—automotive stuff is a no-go—down your toilet, filling the P-traps in your sinks and shower. This will fend off freezes that could transform your plumbing into mini glaciers.
Keep all faucets closed and your water heater bypassed, locking in the antifreeze’s power. Think of antifreeze as a winter coat for your pipes, keeping them snugly protected.
It’s an essential step in ensuring your RV greets spring without plumbing nightmares!
Appliance Preparations
You don’t want your fridge turning into a science experiment over the winter, so make sure you drain any water from the refrigerator and icemaker to avoid a chilly disaster.
If your camper’s equipped with a dishwasher, get that antifreeze cycling through the system—it’s like a cozy winter coat for your pipes.
Think of it this way: your appliances have done their job all summer, and now it’s time for them to hibernate in peace without hosting any uninvited guests like mold or stinkiness.
Refrigerator and icemaker drainage
When it’s time to pack up your RV for the winter, don’t let the refrigerator and icemaker escape your to-do list, because a frozen fridge isn’t exactly a tasty treat.
Start by emptying out your fridge – unless you want a surprise science experiment come spring. Unplug it, clean out lingering crumbs, and let it dry completely.
Open the doors and let any trapped water escape – nobody likes a soggy ice-cube maker! For the icemaker, disconnect the water line and guarantee it’s fully drained to avoid a nasty crack from ice expansion.
Leave the fridge door slightly ajar to keep it fresh, and give seals a quick check for any damage.
It’s all about keeping it fresh and trouble-free!
Dishwasher antifreeze cycling
After you’ve transformed your fridge from a would-be science lab disaster zone, it’s time to focus on the dishwasher.
Winterizing this contraption isn’t just about dumping antifreeze and hoping for the best. First, drain every drop of water, because no one enjoys a winter surprise leak.
Grab your RV/marine-grade antifreeze—it’s like a snuggly blanket for your appliances—and toss a bit into the dishwasher’s drain.
Run a quick cycle to let that antifreeze work its magic through the system. This isn’t just a lazy Sunday chore; it’s avoidance of winter disaster when pipes freeze.
Check your dishwasher’s manual to see if the manufacturer left any hidden nuggets of wisdom.
With this, you’re heading towards a frozen-pipe free winter!
Inspecting Pipe Joints and Plumbing Seals
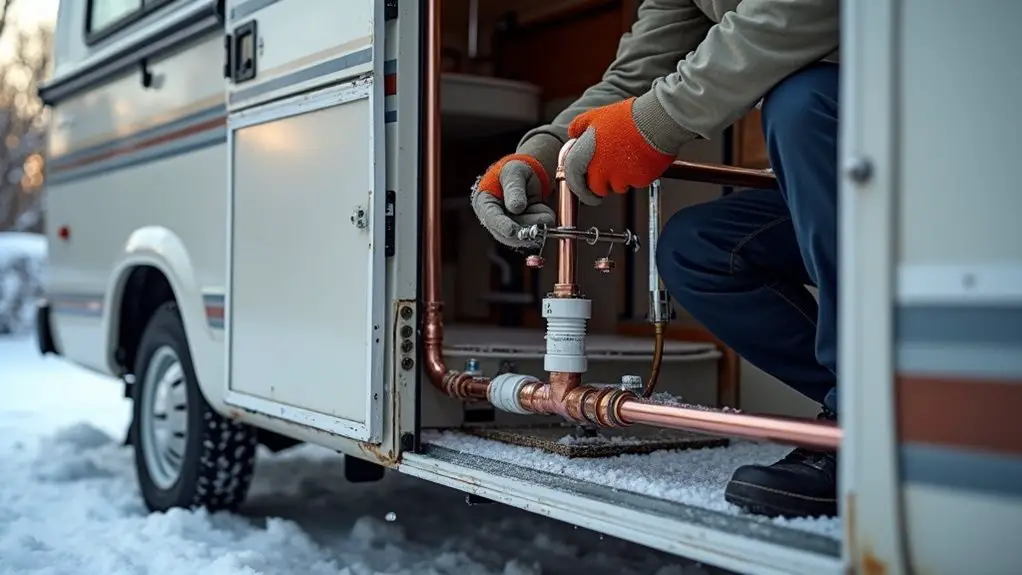
Let’s chat about those pipe joints and plumbing seals—kind of like checking if your shoes have holes before a rainstorm, except, y’know, winter.
You’ll want to tighten any loose connections, slap on some high-quality sealant, or even get cozy with closed-cell foam or pipe wrap to keep things snug.
Trust me, a little effort now saves you from waking up to a van-turned-ice rink or an unplanned winter wonderland indoors, which sounds fun until you’re the one cleaning it up!
Tightening, sealing, or insulating connections
Lo and behold, the winter gods have descended, and it’s time to gear up for the chill battle of the ages—winterizing your RV.
Think of your RV as an insulated winter fortress. First, give pipe joints and plumbing seals a thorough look-see. Loose or cracked seals? They’re like inviting winter in for a snowball fight inside your RV.
Grab some silicone sealant or plumber’s tape and get those connections snug and leak-free. Focus on where pipes sneak in and out, as drafts love those spots.
And don’t skimp on keeping fixtures like sinks and toilets sealed tight, avoiding a winter wonderland of icy plumbing woes. With all connections snug, you’re well on your way to a warm and dry winter season.
Using closed-cell foam or pipe wrap
When winter’s icy fingers start poking around, it’s time to get serious about wrapping your RV’s pipes in some cozy armor. Closed-cell foam insulation is the superhero cape your pipes need, saving them from the harsh cold. This stuff acts like a thermal blanket, reducing heat loss and keeping Jack Frost from wreaking havoc.
Consider adding pipe wrap insulation, especially near joints and weak spots, where the cold loves to strike. Regularly inspect these joints and seals for any signs of wear. If you spot gaps, don’t ignore them—they’re like the plot holes in a bad movie, only they’ll actually cause “drama.”
Snugly seal everything up, ensuring the cold doesn’t sneak in and freeze those pipes solid.
Exterior and Structural Preparations
Alright, envision this: it’s winter, and you’re cozied up inside your RV, sipping hot cocoa, while outside, Jack Frost is doing his thing.
The secret to this cozy scenario? It’s all about that exterior prep! First up, make sure to inspect seals around windows and doors. There’s nothing like a surprise cold draft to ruin your cocoa moment, right?
A breathable cover is a must; it wards off those pesky mold spores while letting your RV breathe easy under its winter coat.
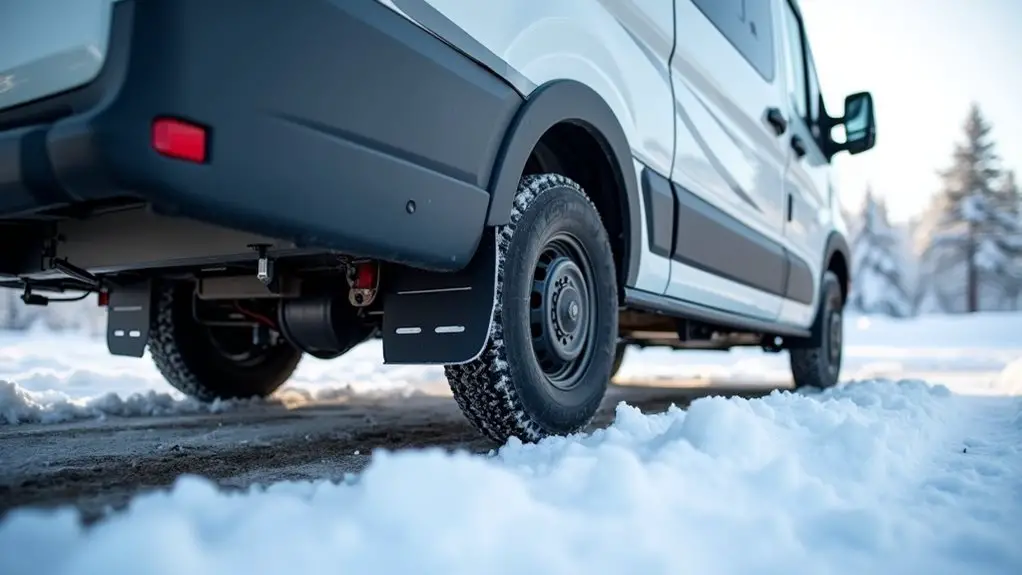
Winter tires? Absolutely—because if you’re slipping and sliding, you won’t be relaxed for long.
Keep your awnings and slide-outs snug, and carry a roll of sealant tape for those quick, mid-journey fixes.
Voilà, your RV’s winter-ready!
Inspecting and Sealing Roof, Windows, and Doors
When winter is just around the corner, it’s time to suit up your RV like a knight in shining armor by checking the roof, windows, and doors for leaks and cracks—because trust me, you don’t want any unwelcome drips crashing your cozy movie night.
Grab some RV-specific sealants, the true superheroes of cold weather, and patch up those brittle spots before they let in more than just cool air.
Your RV will thank you by keeping the inside toasty and dry, rather than resembling a frozen igloo—unless that’s what you’re into, in which case, carry on!
Checking for leaks, cracks, and brittle seals
Every RV owner knows the joy of the open road, but who’s talking about the thrill of finding a leak during a cold snap? Envision this: you’re cozily tucked in, and then—drip, drip—nature’s unwanted surprise!
To avoid this chilly horror, start by inspecting your RV’s roof. Look for any cracks or damage that could morph into mini waterfalls.
Next, shift your focus to windows and doors. Those seals aren’t just for show; brittle or gap-filled seals can invite cold drafts and leaks with open arms. Trust a high-quality sealant to mend any flaws you find, paying extra attention to material junctions. That’s where leaks love to party!
Keep those seals in check throughout winter as temperature swings can challenge their stability.
Applying RV-specific sealants or tape
So, think of this like giving your RV a winter coat—after all, who wants to shiver through a snowstorm with a leaky roof?
Start by inspecting the roof, windows, and doors for cracks and gaps. You might think, “Oh, that’s just a tiny crack,” but trust me, even small gaps can let in cold and moisture faster than you can say “brrrr!”
Use RV-specific sealants, which are flexible and durable, to fill those pesky spaces. Ever try putting duct tape on everything? Consider this the grown-up version.
Apply self-adhesive sealant tape around windows and doors for extra protection. Regularly check and replace any worn materials. Keeping everything snug not only blocks drafts but also prevents that dreaded winter mold.
Slide-Outs and Moving Components
When it comes to your RV’s slide-outs, think of them like the fancy shoes in your closet—needing a bit of TLC before they’re packed away for the season.
Lubricate those rails with a silicone-based lubricant so they glide like a slipper on a ballroom floor come spring.
And, don’t forget to seal those slide seams and gaskets tighter than a teenager’s bedroom door when they’re hiding from chores; this helps keep unwanted moisture out during winter’s relentless chill.
Lubricating rails
Alright, let’s talk about something as exciting as watching paint dry but way more essential for your RV’s well-being—lubricating those slide-out rails and moving components.
Imagine trying to open a stuck jar lid—that’s your slide-out rails without lubrication. First, grab a high-quality RV-specific lubricant. It’s like candy for your RV!
Clean the slide-out mechanism to banish dirt and debris, the supervillains of smooth operation. Use a grease gun on fittings for a consistent spread, focusing on hinges and locks. This helps avoid the horror of winter corrosion.
Treat this like brushing your teeth—do it every few months, especially before stashing the RV for winter. Keeping those rails in prime shape means less drama when spring rolls around!
Sealing slide seams and gaskets
Ever had water sneak into your RV like an uninvited guest? Trust me, it’s not the party guest you want when winter rolls around.
Start by checking slide seams and gaskets for any signs of wear and tear; they’re like your RV’s weather armor. If you spot damage, grab a high-quality RV sealant to patch things up.
Now, for those squeaky slide-out gaskets, a little mild detergent and a dash of water keep them clean. Up the ante with a silicone-based lubricant to guarantee they stay flexible and frost-free.
Slide-out mechanisms not quite sliding? Grease ’em up! Extra weather strips or protective covers might just be the winter jacket your slide-outs need to fend off the cold.
Undercarriage and Skirting Installation
So, you’ve got your RV prepped for the winter chill, but what about those sneaky drafts under your camper?
Adding thermal skirting is like giving your RV a cozy winter coat—protecting it from the bitter cold and keeping your plumbing from freezing.
And let’s not forget to seal any exposed gaps or vents; after all, you wouldn’t want those cold winds slipping in like uninvited party crashers, right?
Adding thermal skirting
Imagine this: it’s a crisp winter morning, and your RV is snugly nestled into its campsite, all prepped for the cold diddy of winter.
Now, consider adding thermal skirting to the mix. It’s like giving your RV a snazzy winter coat! This skirting, made from materials like foam board or fiberglass, hugs around your RV’s undercarriage, keeping Jack Frost out. Not only does it stop freezing air from making friends with your plumbing, but it also lowers your heating costs.
Proper installation means making certain it truly hits the ground so wind doesn’t sneak in and gives warmth the ol’ heave-ho.
With regular checks, especially after snow, you’ll ensure it stays put. Think of it as giving your RV a warm hug all winter long!
Sealing exposed gaps or ventilation holes
When you’re getting your RV ready for winter, sealing those pesky gaps in the undercarriage and ventilation holes isn’t just a good idea—it’s practically mandatory.
Think of it as putting a snug sweater on your RV to keep cold air out and heating costs down. You’ve got options, though—foam board or spray foam work like those magic potions in a fantasy novel, effortlessly sealing gaps.
As for the all-important skirting, this not only keeps your RV’s bottom toasty warm, but also acts like a superhero shield, defending against snow and ice.
Don’t forget to check around wheel wells and vents, too—sneaky culprits of heat loss. Toss in a breathable cover, and your RV’s winter-ready, cozy, and dry!
Electrical and Propane Systems
Hey there, RV enthusiast! Ready to tackle the electrical and propane systems? First up, pop those leisure batteries out and bring them inside for a winter cocoon.
Want them to last? Hook ’em up to a smart trickle charger—low-amperage, of course.
Now, onto the propane system: double-check all connections because leaks aren’t exactly a fun surprise. Also, keep those tanks topped off to shoo away any pesky moisture.
Don’t forget to drain the propane system by running appliances dry. You’ll thank yourself later when things don’t go boom in freezing temps!
Before you say goodbye for winter, test your electrical components. Nothing says “fun spring” like frantically fixing things.
Stay warm and powered-up, road warrior!
Battery Care and Storage
You’ve winterized everything else, so let’s not let the battery feel left out—it needs some TLC too!
To avoid that dreaded dead battery come spring, disconnect and store it in a snug, warm spot off the chilly ground.
You can spoil it with a trickle charger or use a disconnect switch to keep it lively and ready for action. Regular calibration every three years helps keep capacity readings accurate and prevents surprises come spring battery calibration.
Charging deep-cycle batteries
Let’s face it, deep-cycle batteries are the unsung heroes of our RV adventures, quietly powering up our gadgets and keeping the lights on while we focus on s’mores and sunsets.
As winter approaches, charging them to full capacity before storage is vital to prevent sulfation—a sneaky gremlin that shortens battery life. Grab a smart trickle charger; it’s like having a mini-guardian, keeping your battery happy without overcooking it.
Checking the battery’s electrolytes is like hydrating after a long hike; essential and surprisingly easy. Just top ’em off with distilled water when needed.
And remember, storing these bad boys somewhere warm sidesteps the ice monster that freezes and wrecks them. Trust me, you’ll thank yourself come spring.
Disconnecting and storing in insulated location
Imagine this: you’ve just returned from an epic RV trip, and now you’re staring down your trusty battery like it’s a moody teenager.
You’ve gotta turn into a battery whisperer to keep it happy over winter. First, disconnect it to stop the cold from turning it into a frozen brick. Store this grumpy teen in a warmer place, away from the freezing clutches of winter.
Give it a comfy spot on an insulated surface to avoid it catching a cold from the floor. But don’t neglect it! Regular check-ups guarantee it’s charged and corrosion-free.
Think of it like checking your fridge—important but easy to forget. Use a smart trickle charger to keep the battery healthy, preventing winter blues!
Using battery maintainer or disconnect switch
When it comes to battery care during winter storage, neglect isn’t an option unless you’re fine with springtime surprise shopping for a new one.
The cold’s not a battery’s best bud, so give it some TLC. Disconnect that leisure battery to protect it from chilly damage. Or, play it safe and hook up a maintenance charger to keep it juiced while you’re off enjoying hot cocoa.
Between sips, check your battery’s essentials—voltage and connections—so it’s ready to roll come spring. Insulate the battery from Mr. Freeze while you’re at it.
If you can, tuck it indoors where it’s warm and cozy, away from the arctic blast. Follow these tips, and your battery might just thank you with a vroom next season!
Propane System Precautions
When it comes to winterizing your RV, don’t forget about the propane system—it’s like leaving a jar of Nutella open and wondering why it’s not as good later.
Start by checking for leaks with a detector because nobody wants a surprise kaboom when you’re just trying to relax.
Make sure to turn off the solenoids and regulators, and cover those propane tanks like they’re shy at a party, sealing the vents to keep them cozy through the chilly months.
Checking for leaks with detector
Let’s talk about leaks, those sneaky little devils that can ruin an otherwise relaxing RV trip.
Here’s the thing with propane leaks—they’re like uninvited guests. You want them gone ASAP! Start by mixing up a soap solution or grabbing a propane leak detector. Go full detective mode and check connections, hoses, and fittings. Spot bubbles? You’ve got a leak!
Propane appliances, like fridges and stoves, should be turned off—trust me, you don’t want any surprise fireworks show. Regularly eyeball your propane tank and its connections for any wear or rust, because those lead to leaks, too.
And hey, keep your propane tanks somewhere breezy and out of the sun, so you can camp worry-free during winter.
Turning off solenoids and regulators
Before you pack away your RV for its long winter nap, make sure to hit the brakes on your propane system by turning off all solenoids and regulators.
It’s like putting your propane on a timeout—no sneaky gas leaks allowed! Disconnect the propane tank regulator to stop any pressure buildup.
Think of it as ensuring your RV doesn’t burp while it’s hibernating. Check those hoses and connections for any wear and tear.
After all, you don’t want a spring surprise that’s anything but pleasant. Follow your RV manual’s propane shutdown advice for a smooth process.
And hey, keep a propane leak detector inside for peace of mind. It’s like having a trusty friend watch over things, just in case.
Covering tanks and sealing vents
Once you’ve put your propane system on a “time-out,” it’s time to snugly tuck those propane tanks into their winter jackets.
Now, we’re not talking cashmere sweaters here—just some good, weather-resistant covers. You wouldn’t want your tanks shivering under a pile of snow, right? Remember, cover those tanks tight to prevent sneaky leaks.
Oh, and before hitting the winter snooze button, check your propane system for leaks. We’d recommend keeping the connections sealed and strong as a bear’s grip!
Next, seal up any vents leading to the propane compartments. Cold air’s not invited to this party and can cause trouble if it sneaks in.
Give those propane lines a winter once-over, ensuring they’re intact. Nothing spoils winter fun like a frostbitten RV!
Inverter, Shore Power, and Breakers
Alright, let’s talk about your RV’s electrical system—yep, the magical web that keeps your gadgets running and your coffee maker producing that morning elixir.
Before winter sets in, make sure you’re flipping off breakers like you’re shutting down a disco party, ensuring they don’t throw a fit come spring.
Oh, and don’t forget to reset any GFCI outlets and give your shore power cables a raincoat—nobody wants a soggy cable nightmare!
Turning off breakers
So, you’ve finally braved the overwhelming task of winterizing your RV – kudos to you! It’s a bit like turning your home into a bear preparing for hibernation, isn’t it?
First things first, let’s focus on those breakers. Turn off your inverter to stop any power drain – we don’t want your RV sucking juice like a thirsty toddler! Unplug from shore power to guarantee you’re not inadvertently drawing electricity from the grid; nobody wants a surprise electrical mishap.
Make sure every circuit breaker is switched off. It’s a safeguard against mischievous power surges that love to catch you off guard.
Don’t forget the appliances – shut ’em all down. You’ll prevent your fridge from transforming into a frosty art piece.
Happy winter snoozing!
Checking GFCI reset
Ah, the good ol’ GFCI outlets—those sneaky little protectors hiding throughout your RV!
They’re essential for making certain your electrical systems play nice, especially in damp areas like your kitchen, bathroom, or even outside.
To check if your GFCI is ready for action, start with a fun game of “Find the Outlet.” Once located, press the “test” button—this should trip the outlet.
Then, press “reset” to restore power. If it doesn’t reset, your GFCI might be whispering, “Help!” and hinting at a circuit issue or the need for a replacement.
Lucky for you, winter’s arrival is the perfect time to verify your RV’s electrical guts are in tip-top shape, whether you’re plugged into shore power or using an inverter.
Protecting shore power cables from moisture
When winter rolls around, your shore power cables need some love and attention too—lest you want them to turn into frosty popsicles with a side of electrical hazard.
First things first, give your cables the once-over. Inspect them for pesky wear and tear. You don’t want moisture seeping in through cracks, causing all sorts of electrical mischief.
Then, get those weather-resistant covers on! They’re like tiny raincoats for your connections.
Also, elevate your cables off the ground. Why let them swim in puddles?
Finally, make sure your inverter and circuit breakers are snug in a dry, cozy spot. Moisture isn’t their friend.
Regularly clean those connection points, otherwise debris might invite the moisture monster back for more mischief.
Climate Control and Insulation
Let’s talk about keeping your RV cozy as a marshmallow on a summer bonfire, even during the chilliest winter months. Insulation is your best buddy here.
You can start by using Havelock wool—think of it as your RV’s woolly sweater. It keeps the heat in and the chilly winds out. Pair that with custom magnetic window covers, and you’re golden.
But wait—don’t forget ventilation! Keep vents open while in dry storage to avoid turning your RV into a moldy science project.
Electric heaters are a cozy option, but they’re greedy power munchers, so consider diesel or LPG alternatives when off-grid.
Monitor temps like a hawk, and slap foam insulation on pipes and 12V heating pads on water tanks to stave off freezing disasters.
Furnace Inspection and Duct Cleaning
Let’s face it, nobody wants their RV to resemble a meat locker, so inspecting your furnace before Jack Frost arrives is essential.
Start by checking the ignition to make sure it sparks joy—and warmth—before you get cozy.
Don’t forget to look at those propane lines and the exhaust vent; you wouldn’t want any uninvited surprises making things chilly or gassy.
Checking furnace ignition
Ah, that trusty furnace of yours—keeping the chill at bay, unless, of course, it decides it’s on vacation.
First things first, check the furnace ignition. Peek around for any debris or blockages—the tiniest dust bunny might ruin your cozy plans.
Next, run through the ignition sequence; it should light up like a charm and burn without making weird noises or smells.
Now, don’t forget the ducts! Regular cleaning keeps dust and lint from hogging all the airflow.
Swap out that gross filter, too. A fresh one helps your furnace breathe easy and work smarter, not harder.
If it’s persistently lazy and won’t ignite, give a pro a call. Some furnace hiccups need more than just a stern talking-to!
Inspecting propane lines and exhaust vent
So, your furnace has decided to cooperate—cheers to that! But don’t let your guard down.
It’s time to inspect those stealthy propane lines. Grab some soapy water, splash it on the lines, and watch closely. Bubbles mean you’ve found a gas-leak culprit that needs immediate attention.
Next up, let’s talk vents. They’re like the lungs of your RV’s heating system. Make sure they’re clear of any obstacles so you don’t suffocate your furnace—or yourself!
And since breathing dust isn’t a superpower anyone wants, clean those furnace ducts.
Feel uncertain? Call in a pro—for your sanity and safety. An annual professional check-up will guarantee your propane system and furnace live happily ever after, without any hiccups.
Supplementing with Heat Cables and Pads

So, you’ve decided that you’d rather not wake up to frozen pipes in your beloved RV?
Enter heat cables and pads — your new best friends in the war against winter. They keep your tanks and pipes unfrozen, kind of like the cozy socks of your plumbing system.
With a handy thermostat connection, you can guarantee they kick in exactly when the temps start nosediving.
Tank heaters and pipe heating solutions
When winter swoops in like an uninvited guest crashing your party, tank heaters and pipe heating solutions become your RV’s best friends.
Think of them as the electric blankets for your tanks and pipes, ensuring they don’t turn into popsicles. Yeah, nobody wants frozen water tanks in the middle of nowhere!
These sneaky gadgets use electricity to keep your RV’s plumbing warm and cozy. With self-regulating heat cables that adjust based on temperature, your pipes will stay frost-free.
A neat feature is their waterproof nature, so a bit of rain won’t ruin your day. Just be sure these heaters are a match for your RV’s electrical system—you don’t want a meltdown before spring!
Regular checks keep everything smoothly running.
Thermostat connection for automatic control
Imagine this: your RV is nestled deep in the woods on a freezing winter day, yet you’re inside with toasty toes and a warm cup of cocoa. How’s that possible, you ask?
It’s all about connecting a thermostat to your heating system. This not-so-secret weapon gives you automatic control over the van’s temperature.
Add heat cables along exposed pipes and heating pads for those chilly water tanks, and you’ve got a winter fortress.
Think of programmable thermostats as the brain behind your operation—they let you set heating schedules, so you’re not wasting energy when you’re out exploring.
Keep an eye on your settings regularly to guarantee everything’s running smoothly.
Winter’s got nothing on you now!
Installing Insulation and Draft Barriers
When you’re winterizing your RV, adding a bit more insulation is like wearing an extra cozy sweater—it’s all about keeping the chill out!
Reflective insulation and thermal curtains can help trap heat inside, making your space feel like a warm hug on a snowy day.
Don’t underestimate foam plugs and skirting panels either; they’re like booties for your RV, keeping the cold from sneaking in where it’s least wanted.
Reflective insulation
Even though installing reflective insulation mightn’t sound like a blockbuster Saturday night plan, it’s a game-changer for keeping your camper van cozy during those frosty winter months.
Trust me, once you feel that winter chill, you’ll toast to this genius hack. By reflecting radiant heat away and sealing it with your camper’s soul, it keeps you warmer than a fuzzy blanket and hot cocoa.
Just press it up against windows, walls, and the roof using secure adhesive or trusty fasteners.
But don’t stop there! Seal those sneaky gaps or seams to prevent unwanted drafts.
And for bonus points, slap on some draft barriers around doors and windows. You’ll marvel at your craftiness while snugly tucked inside, enjoying the toasty results.
Thermal curtains, foam plugs, skirting panels
Alright, so you’ve got your reflective insulation up, and you’re probably feeling like a DIY superhero, right?
Time to amp up that warmth game with thermal curtains. These bad boys make sure you’re not donating all your heat to the great outdoors. It’s like giving your van a cozy wool sweater.
Next, slap some foam plugs around windows and doors. They stop cold drafts colder than a polar bear’s toenail!
Now, let’s talk skirting panels. These panels keep the chill from sneaking under your van, safeguarding your pipes from turning into icicles.
With all these layers, your van becomes a fortress against winter. Don’t forget to give everything a regular checkup to keep moisture out, because nobody likes a moldy mansion on wheels!
Moisture and Rodent Prevention
Envision this: winter’s coming, and it’s not just your teeth that are chattering. Critters are looking for a cozy camper van to call home.
Start by cleaning every nook and cranny, eliminating crumbs that could be a rodent’s buffet. Remove all food from your camper like you’re packing for a permanent road trip—fridge, pantry, even coolers.
Next, play inspector gadget and seal potential entry points like gaps around windows, doors, and vents with ninja-like precision.
Don’t let humidity party inside your van—arm yourself with silica gel or a dehumidifier to keep mold and mildew at bay.
Regular check-ins with your camper will help spot unwelcome guests or sneaky condensation before they crash the winter party.
Additionally, schedule monthly inspections to monitor for signs of rodent activity and ensure all potential entry points stay sealed entry points.
Moisture Control Strategies
You know those pesky puddles and foggy windows that seem to magically appear in your camper?
Well, it’s time to show moisture who’s boss by using desiccants, vent covers, or a trusty dehumidifier!
Crack open those vents just a smidge with covers on, to keep air flowing and say goodbye to that unwanted indoor rainforest.
Using desiccants, vent covers, or dehumidifiers
While it might seem like moisture is just nature’s way of helping you with unwanted hair frizz, in your camper van, it’s a whole other ball game. If you’re not careful, you could end up growing a garden of mold!
Desiccants, like those silica gel packs you find in shoe boxes, are your best friends against dampness. Pop them around your van to absorb moisture and banish mildew.
Not into DIY solutions? Try using a dehumidifier. It’s like having a personal moisture-sucking superhero that keeps things dry as a desert.
And don’t forget vent covers! They’ll let airflow in while keeping Mother Nature’s soggy gifts out.
Together, these tools save your van from turning into an unintended terrarium!
Opening vents slightly with covers
Just when you thought battling moisture with silica gel packs was the height of DIY heroics, there’s another trick up your sleeve for keeping your camper van dry: it’s all about those vents.
You know, aiming for that perfect balance of “open enough to breathe” but “closed enough to not become a snow globe inside.” And let’s be honest, nobody wants to find snowflakes on their dashboard!
By slightly opening vents with covers, you get that sweet airflow without inviting winter inside. Plus, these breathable covers are like the ultimate outdoor gear for your vents—keeping wet stuff out while letting your camper breathe.
Just don’t forget to check them regularly, or you’ll unknowingly conquer moisture—with a side of mold.
Rodent Intrusion Protection
Let’s face it, nobody wants uninvited furry guests turning your camper into their winter getaway, so blocking off the undercarriage is a must.
Grab a flashlight, inspect your wiring for chew marks—it’s like checking for mouse graffiti—because those tiny teeth can turn your setup into an electrical nightmare faster than you can say “cheese.”
For good measure, chuck a few scent deterrents or traps around; think of it as persuading Mickey and friends that there are better vacation spots elsewhere.
Blocking undercarriage access
Although you might think your RV is safe from critters during winter, rodents can be sneakier than a ninja on a stealth mission. To keep these furry invaders at bay, start by blocking undercarriage access points with steel mesh or hardware cloth. Trust me, they’re not getting through that fortress!
Also, check around your plumbing and electrical lines—rodents love squeezing through those gaps like it’s a game of hide and seek.
Don’t underestimate their potential entry points, so inspect and maintain any undercarriage coverings regularly.
Got a smooth, elevated surface? Perfect! Store your camper there to prevent rodents from setting up camp underneath.
Throw in some rodent repellents or traps for an extra line of defense. It’s like having a bouncer at your RV’s door!
Inspecting wiring for chew marks
Kicking off from guarding your RV like a fortress against the rodent ninjas, it’s time to turn our attention to another sneaky byte of the problem: wiring.
Those furry little invaders love to munch on your wiring like it’s the entrée at a rodent buffet. Grab a flashlight and start inspecting areas where wires are openly flaunted, like the engine compartment and undercarriage.
Spotting chew marks or frayed wires isn’t just annoying—it’s a fire hazard waiting to happen. Consider this your mission: finding signs of nibbling that could turn your RV into a giant toasted marshmallow.
And hey, regular checks around seals of windows and doors help keep these critters from turning your beloved RV into their winter getaway.
Scent deterrents and traps
When it comes to keeping those sneaky rodents out of your camper van for the winter, a little creativity goes a long way.
Ever think of using peppermint oil as a rodent bouncer? It turns out, mice can’t stand the smell. Just dab some around your camper van, and voilà! It’s like a natural force field.
Another trick? Set those sneaky traps—snap or glue ones—in spots rodents might sneak. They’ll work when creativity meets cunning.
Don’t forget to seal gaps around windows, doors, and vents. That’s like locking out unwelcome guests at a party.
Keep your van spick and span, because leftover crumbs might as well be a rodent party invite.
Final Checks Before Storage
Before you tuck your RV camper van away for its winter nap, you’ve got a few final touches to tackle.
You’ve danced with antifreeze; now, make sure the plumbing’s frost-proof. Double-check those tires—they’re not going to inflate themselves! Give them proper inflation and maybe toss in some wheel chocks for good measure.
Your battery’s not just going to winter in style without some love; disconnect it or hook it up to a maintenance charger.
Now, onto the seals—windows, doors? Think spa day with sealant to keep them nice and tight.
Finally, channel your inner neat freak and evict those pantry squatters—bye-bye, snacks! Clean thoroughly to keep odors and pests at bay.
It’s like prepping your home for hibernation!
Performing a System-wide Walkthrough

Alright, so you’re thinking about taking your RV on its next big adventure, but before you stow it away for winter, let’s be sure it’s in tip-top shape.
First, grab your checklist and pretend you’re a super detective—double-check every valve, seal, and electronic as if they’re suspects in a mystery.
And don’t forget to channel your inner Sherlock by scouting for any hidden water; it’s sneaky and loves to hide where you least expect it, like in that one drawer full of mismatched socks.
Checklist of all valves, seals, and electronics
So, you’re staring down your RV, checklist in hand, ready to tackle the not-so-glamorous task of making certain everything’s ready for the icy grip of winter?
First up, inspect those water valves. Low-point drains should be wide open, and don’t let that antifreeze sneak into the water heater—double-check the bypass valve.
Imagine the seals around your windows, doors, and vents as the bouncers of your RV, keeping winter out. If there are any cracks, give them some sealant TLC.
Now, flick on all the lights and electrical gizmos to verify they work before disconnecting the battery for its winter nap.
Finish with a final walkthrough—because nothing says “oops” like a forgotten open faucet when Jack Frost comes calling.
Double-check for trapped water
You’ve already given your RV a good once-over, but it’s time to channel your inner detective for a more thorough check. Think of it as hunting for water’s hide-and-seek spots.
Start by making sure every faucet, indoor and outdoor, is wide open. Water loves to stick around, so let those sneaky drops out. Don’t forget the low-point drains underneath your RV—they’re like your RV’s escape routes for hidden water.
Next, give the toilet a good flush until it’s dry as a desert. Your water heater needs some love too; make sure it’s thoroughly drained, or risk an icy surprise.
Once you’ve evicted every last drop, seal up those faucets and drains before you let antifreeze do its magic.
Covering and Storing the RV
Alright, let’s talk about covering and storing your RV because leaving it exposed in winter is like asking for a raccoon pajama party.
A breathable RV cover is your best friend to keep that van safe from the elements, allowing air to circulate while protecting it from sun damage—unlike a tarp which might trap moisture and make your RV smell like an old gym sock.
Don’t forget about the little guys, too—tire covers and vent plugs are essential for keeping the sneaky winter gremlins out, prolonging your RV’s life while you sip hot cocoa inside your warm, raccoon-free home.
Breathable RV cover vs tarp
When it comes to deciding whether to wrap your beloved RV with a breathable cover or just toss a tarp over it, the choice might seem as trivial as choosing between pancakes and waffles for breakfast.
But hey, unlike your breakfast choices, this one actually matters! A breathable cover lets your RV breathe, reducing moldy surprises.
Tarps, on the other hand, can trap moisture like an overexcited hug, leading to damage. While tarps are cheaper, they tend to degrade faster in the sun, demanding frequent replacement.
Breathable covers fit snugly like a pair of skinny jeans, handling wind and snow like a champ.
Tire covers, vent plugs, UV protection
Envision this: your RV, snug as a bug in a rug, basking in winter hibernation. To keep it cozy, throw on tire covers—they’re like sunscreen for your wheels. They fend off those menacing UV rays that can cause your tires to crack and age faster than a banana sitting in the sun.
And let’s not forget vent plugs; they’re the trusty bouncers keeping moisture and uninvited pests from crashing your RV’s interior party.
Now, don’t skimp on the UV protection either. It’s like a shield for your RV’s vibrant exterior and plush interior, preventing it from looking like it’s survived a rainbow apocalypse.
Secure that breathable, weather-ready cover, and stash your RV in a breezy spot. Your ride will thank you come spring!
Mid-Winter Inspections (Optional)
As you cozy up indoors with cocoa and your favorite TV show, don’t forget your trusty RV camper van might need a little mid-winter TLC.
Believe it or not, condensation’s not a new brand of cologne—it’s your van’s way of inviting mold to the party.
Give those seals a once-over, too; there’s nothing like an uninvited draft to make your van’s interior less than toasty.
And seriously, has anyone told the tires it’s not cool to go flat in winter? Regularly checking tire pressure and maybe moving the van every few weeks helps keep them in shape.
As for heating, guarantee those heaters are ready for action so you’re not left shivering, even if your battery’s fueled up and ready.
Quick Checkups Without Full Reactivation
You mightn’t be taking your RV on a full expedition this winter, but that doesn’t mean it gets to hibernate completely.
Take a quick peek at the battery charge—because finding a dead battery in the spring is like finding out your favorite snack got eaten while you weren’t looking.
Keep an eye on tire pressure, propane levels, and any sneaky leaks or ice damage too, ensuring your RV stays road-ready without needing a full wake-up call.
Checking battery charge
While checking your RV’s battery mightn’t be as exciting as planning your next road trip, it’s a small task that can save you from big headaches down the line.
Imagine hitting the road, only to find your adventure stalled by a dead battery. Yikes! A quick check with a multimeter can dodge this disaster. You’re aiming for a reading of 12.6 volts—anything less, and your battery’s sulking.
Terminals corroded? Don’t sweat it—clean them with a baking soda and water mix. Got a battery that’s not sealed? Better peek inside and top off with distilled water to fend off freezing mishaps.
And hey, consider a battery maintainer to keep things tick-tock perfect throughout winter. Your journeys will thank you!
Looking for ice damage or leaks
Feeling pretty good after ensuring your RV battery won’t quit on you mid-adventure, right? Now, let’s switch gears and hunt for any naughty leaks or ice damage. Think of it as playing detective with your camper. Check the pipes and fittings––cracks can sneak up on you faster than Aunt Sally’s fruitcake at Christmas. Eyeball the ol’ water heater for leaks too. Ice around faucets? It’s like your RV’s trying to audition for a winter wonderland gig. Check seals around windows and doors; gaps here might give spring showers a warm welcome, which nobody wants. Peek at the roof and make sure it’s sealed tighter than your secret cookie stash. Catching a problem now saves the future you from repair headaches!
Monitoring propane levels and tire PSI
Ever found yourself in the middle of nowhere with an empty propane tank and a flat tire? Not the thrilling adventure one imagines! Nobody wants to brave the chill without heat or be stuck because tires are flatter than a pancake. So, keep a keen eye on your propane levels. You should aim for a healthy 50–70% charge. Use a propane pressure gauge; you’ll see about 100–200 psi when full. It’s a smart move to check mid-winter if you’re relying on propane—trust me, running out isn’t fun. Likewise, don’t forget about tire PSI. Regularly checking can save you from a stranded woe. Quick checks mean no deep dives into full reactivation—you’re prepped without breaking a sweat! Remember that regular outdoor exposure, or Vitamin N, supports mood and immune health even on cold days.
Spring De-Winterization Preview
Spring is on the horizon, and it’s finally time to shake off the winter cobwebs from your RV camper van! You’ve successfully survived another winter, now let’s talk de-winterization. Imagine reconnecting those plumbing links like a DIY superhero, flushing out that antifreeze with dramatic flair. But seriously, before any epic road trips, test all water system components for leaks. Trust me, sprouting a mini indoor waterfall isn’t as refreshing as it sounds.
Once you’ve conquered the plumbing realm, don’t forget to rekindle your RV’s electrical heart by reconnecting batteries. That sweet sound of appliances humming back to life? Pure bliss. Oh, and give your RV exterior some love—inspect seals and caulking for winter’s wear and tear, resealing as needed. No leaks allowed.
Reverse the Process Safely
Alright, it’s time to say goodbye to winter and hello to RV adventures, but first, you’ll need to flush out that antifreeze from your water lines. Think of it like a spring-cleaning audition—give your faucets and toilets a run-through to ensure there’s no pink stuff sneaking around and that everything’s in tip-top shape. Don’t skip the part of reconnecting any bits you’ve removed, like that sneaky anode rod, so your RV’s ready to roll down the highway without any watery hiccups!
Flushing systems
So, how do you safely unwind your RV from its icy slumber and get those water systems back to their happy, flowing selves? Imagine this: your RV, eager to hit the road again, patiently waiting for you to set it free from its frosty shackles. Start by reconnecting the water supply—no magic involved here, just a bit of love and care. Flush each faucet and shower until water runs clear. You’re not a wizard in training; you’re just making sure there are no pesky air pockets. Oh, and let’s not forget the water heater bypass! Make sure it’s in the service position, or you might end up feeling like you’re starring in a slapstick comedy. Voila! Your RV is ready to roll.
Removing antifreeze
Ever wondered how to crack that RV out of its antifreeze cocoon without breaking a sweat or, heaven forbid, your pipe system? Picture this: reconnect the city water supply and run each faucet like you’re getting ready for a water park party. You’ll want clear water galore, flushing out that pink antifreeze until it’s nothing but a memory. Once that’s settled, shuffle the water heater bypass to its normal spot — ensure every trace of pink is history first. Don’t trash that used antifreeze just anywhere; be the eco-hero and take it to a dedicated RV dump station. Check that all is as it should be, reinstall anything previously removed, and give your RV plumbing system a well-deserved round of cheer!
Checking systems before use
As you emerge from the full-on hibernation mode and get ready to reawaken your beloved RV, you might feel like you’re about to revive an ancient artifact.
First things first, check if the water heater bypass is in the right spot. You don’t want a surprise antifreeze shower!
Make sure all faucets are tightly closed and the freshwater pump hasn’t decided to become a leaky mess during its nap.
Before giving the system full power, inspect those low-point drains for frost or debris.
Test the water system by cautiously turning on the city water.
Keep an eye out for leaks or any funny business.
Finally, celebrate the proper water flow and ensure that pink antifreeze is gone for good.
Cheers!
FAQ Section
So, you’ve decided to winterize your RV, and now you’re bombarded with questions like, “Can I do it without antifreeze?” Spoiler alert: it’s risky since even a wee bit of leftover water can cause big problems when it freezes.
Plus, while it might be chilly enough to keep your ice cream frozen, RVs aren’t keen on freezing temps, so find out whether skirting and battery removal are actually necessary before you cozy up for a warm winter.
Can you winterize without antifreeze?
Why risk it? Skipping antifreeze when winterizing your RV is like leaving your ice cream out in the sun—meltdown’s inevitable! You might think blowing out water lines is enough, but any sneaky residual water hiding in the nooks and crannies will freeze and wreak havoc. Trust me, burst pipes aren’t part of anyone’s winter wonderland plans. Antifreeze doesn’t freeze solid; it stays slushy, keeping your pipes comfy even when temps plummet. Trying a no-antifreeze winter without thoroughly checking every corner for leftover water is a gamble. Most RV manuals and pros aren’t just killjoys; they recommend antifreeze because it works! So, why not avoid the epic drama of dealing with frozen pipes in the middle of a blizzard?
How long does it take to winterize an RV?
Ever wonder how long it actually takes to winterize your beloved RV? Well, brace yourself, because it’s not as daunting as it sounds—promise!
If you’re tackling this DIY, you’re in for about 1 to 3 hours of fun-filled winterization. Adding some antifreeze? That’s a good 15-30 minutes. But blowing out those water lines with your trusty air compressor might stretch things by 20-40 minutes, longer if you’re doing faucet karaoke. Nervous about leaks? Give yourself another 5-10 minutes for some detective work.
If you prefer to cheer from the sidelines, pro shops can get you winter-ready in 30-90 minutes, tops. So kick back, relax, and beat the first hard freeze like a pro! It’s easier than getting a toddler to bed!
What temperature can damage an RV?
Imagine you’re all cozy, chilling by the campfire, and then it hits you—what happens if your RV is left to face Jack Frost on its own? Well, sadly, an RV facing freezing temps isn’t going to fare well.
Below 32°F (0°C), your RV’s vulnerable bits like plumbing and water lines begin to ice up.
If it dips below 30°F (-1°C) for over thirty minutes, things can get dicey—think frozen or burst pipes!
And don’t even get me started on single-digit temps; icy disaster city!
Wind and exposure make it worse, especially if your RV isn’t snuggling up with some good insulation or antifreeze.
Do I need to remove the RV battery in winter?
Speaking of keeping your RV safe when it’s colder than a snowman’s nose outside, let’s talk about another chilly weather tip: your RV battery. You’d think winter will just leave it alone, but nope! Many winterization guides swear by disconnecting or outright removing your RV’s leisure battery during the frosty months to keep it from throwing a temper tantrum—aka, discharging or corroding. If dragging it indoors sounds like too much effort, set it on a non-conductive surface and hook it to a battery maintainer. It’s like giving your battery a cozy blanket. A trickle charger can keep that baby going strong if you leave it in your RV. Before reinstalling, check for any corrosion and tidy up those connections!
Is RV skirting necessary?
Why bother with RV skirting, you ask? Well, think of it as a cozy blanket for your camper.
Sure, it’s not on the essential winter checklist, but skirting can keep your RV’s underbelly warmer by a few degrees. Perfect if you’re parked in a mini Ice Age or just spending your winters in the Wintry Wonderland!
Skirting helps reduce heat loss and lessens the chance of frozen pipes, so you’re not playing the plumber when spring hits.
Sure, almost any material can be used—from rigid panels to snazzy insulated fabric. Just be careful not to create a resort for rodents or a sauna with trapped moisture.
Ideal for prolonged parking in cold climates, skirting makes winter camping snugger!
Frequently Asked Questions
How Do You Winterize an RV Step by Step?
You’d start by draining all water systems, blow out lines with an air compressor, and introduce RV antifreeze. Ensure all faucets and valves, including the water heater, are bypassed or filled with antifreeze to prevent freezing.
How Do You Winterize a Camper Checklist?
You’ll need to drain all tanks, blow out lines, bypass the water heater, and run antifreeze through all faucets and toilets. Make sure caps are secured and inspect seals for leaks, then store safely.
How Many Gallons of RV Antifreeze to Winterize a Camper?
You’ll need 1-2 gallons of RV antifreeze for a small camper van and up to 3-4 gallons for larger RVs. Ensure each fixture shows pink antifreeze to confirm protective coverage throughout the entire system.
Do You Leave Faucets Open After Winterizing RV?
You should close faucets after winterizing your RV with antifreeze. Keeping them closed maintains antifreeze in the lines and prevents drips. Refer to your RV’s manual for specific instructions regarding valve positions.
Summing Up
So, you’ve become the hero of your own RV winterization saga! You’ve tackled freezing pipes, embraced the magical world of antifreeze, and even made friends with your toolkit. Now, your van’s snug as a bug, ready to hibernate like a champ. Come spring, you’ll hit the road without a hitch—thanks to your newfound winter warrior skills. Remember, it’s all about the peace of mind that keeps future adventures as smooth as a campfire story. Cheers to a cozy winter!